Crossflashing The Lite-On LTN-24102M CD-RW Drive to an LTN-24102B

This page discusses applying the firmware from a  Lite-On IT LTN-24102B optical drive to the LTN-24102M model. I purchased two of these drives on eBay for approximately $8 and shipping. And then I began to wonder why Lite-On IT didn't have any firmware for these drives at their web site....
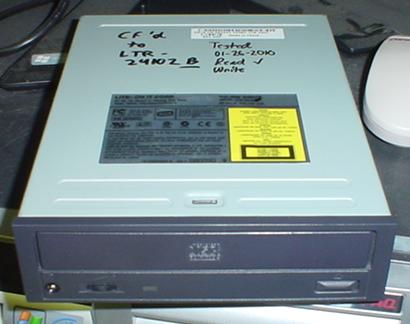
LTN-24102M drive (and despite what is marked on the case, this drive was tested to write)
Before we get too far, however, there is the following WARNING:

The actions discussed within this page must be done with care and only after following the directions. It's quite possible to damage your Lite On CD burner beyond all means of economical repair (or any repair at all). Firmware is the lifeblood of your optical drive, and if damaged or destroyed, recovery may become impossible. This must be kept firmly in mind--so if you're not sure, DON'T. If you are working on a drive that you do not own, DON'T. If you choose to do anything described on this page, YOU ARE RESPONSIBLE FOR ALL THE RESULTS whether good or bad. That means that if you break your drive, it is YOUR problem. Don't come crying to me about it. If you have questions, always feel free to drop an e-mail. I'll do my best to help if you have problems, but I am guaranteeing nothing and will accept no responsibility for what you do.

If your computer system or Lite On optical drive is under warranty, you would be well advised to consider not doing any of this. You will void your warranty, at least in theory (and if you're honest). Do not expect that Dell Computer or Lite-On will help you. If you call Dell, they'll probably say "firm-what?". I don't know what Lite-On would do.

Although this information is presented in good faith, there is no guarantee that it is 100% accurate or that it will work for you. Please keep this in mind before proceeding, if you choose to proceed.

What Is the LTN-24102M?

By all accounts, the Lite-On LTN-24102M is an OEM drive produced specifically for Dell Computer. Searching around the web seems to reveal that it was used primarily in the Dell Dimension 4600 personal computer. It's fairly likely that this drive also saw use in the closely related Dimension 2400, 3000, and OptiPlex 170L if the purchaser ordered a CD-RW.

It seems highly likely that this model was produced exclusively for Dell, as there are notations on the optical sled in the drive that have the Dell name printed on them.

Why Crossflash?

Dell no longer supports any of the computers that may have used this drive. As such, it is very unlikely that Dell will issue any further updates or improvements to this drive. Lite-On does not produce any updates for this drive because it is an OEM model produced especially for Dell. The closest drive that Lite-On offers support for is the LTN-24102B.

If you needed more reasons:
It is hard to guess why Dell wanted custom firmware for this drive. Maybe they just didn't want users messing their drives up, or maybe Lite-On IT didn't want to support drives that Dell had shipped.

On With The Show

I strongly suggest you read and print this in its entirety BEFORE you flash new firmware to your drive!

So now that we've talked about why you'd crossflash your drive, let's get to it. Again, please understand that this can be a very risky process. You can end up "bricking" your drive and having to buy a new one. People around the Internet say it's unlikely that you can really "brick" a Lite On (or MediaTek based) drive all that easily, but I don't know how true that is. Therefore, read ALL the directions and don't be stupid. Make SURE your drive model is one of the two discussed in this article. Print this page out, or at least consider printing the relevant portion unless you have another computer to read this on.

The Lite-On firmware updater won't work to update this drive's firmware, as it is hardwired to look for a LTN-24102B model number. The work has to be done manually, using some specific purpose tools that will happily write almost anything you want to the flash ROM in the drive. (However, you really only want to write valid firmware to the drive. Anything else will brick your drive!)

You need a few things: MTKFLASH, a DOS boot disk (see instructions if you download this and have no idea what to do with it), a blank 1.44MB floppy diskette (yes, really), and the 5S5A binary firmware update file. If you have Windows XP (or possibly later, although I don't know this for certain) you can make a boot disk right from the My Computer window, by right clicking on the drive and choosing the "Format..." option. However you make your boot diskette, keep it minimal. You don't need to bother with high memory drivers or CD-ROM drivers. You probably don't want to bother with those things, lest one of them interfere with the firmware flashing process.

Whether you use a new or old floppy diskette is up to you. I'd strongly advise that you format the diskette (without making it bootable, and preferably from the command line in Windows) to assure that it is good. Discard any diskette that has errors after formatting. The "make a system boot disk" option blindly writes a disk image file to your diskette and DOES NOT perform any kind of "surface test" on it. Nothing will irritate you more (or potentially ruin your day) than having the flash utility program your drive with damaged firmware because there was a read error. It will also prove infuriating to find that your firmware backup (which you'll make later) was stored on a bad spot of the disk.

Prepare your boot diskette and put both the new 5S5A firmware file and MTKFLASH tool on it. Disconnect all other optical drives in your system, leaving only the Lite-On drive that you will be flashing attached. I don't believe you'll have to disconnect your hard drives, but if you feel it can't hurt, go ahead and unplug those as well. I didn't and had no problems. I would strongly suggest that you not attempt doing this through any sort of bridge such as a USB, Firewire or SATA bridge/enclosure. Play it safe, hook the drive up to an PATA/IDE channel. If you don't have one in your computer, find a computer that does. Jumper the drive to use MASTER or SLAVE, don't leave it at CABLE SELECT.

Remove any discs from the Lite-On drive and start your computer from the boot disk you made.

When your computer has booted from the diskette, start by backing up your drive's firmware. This way, should you lose your nerve or find a problem with the new firmware, you will have a way to go back to the stock firmware. (And while there is a firmware backup available for download here, back yours up anyway. Do it because I'm telling you to if you won't do it for yourself.) This can be done by issuing a command like the following:

MTKFLASH 3 R /B /M backup.bin

The number "3" above indicates the position of your drive on the IDE channels within the system. The numbers mean the following, and they can vary depending upon how your drive is hooked up:

1 - Indicates a drive connected as PRIMARY MASTER
2 - Indicates a drive connected as PRIMARY SLAVE
3 - Indicates a drive connected as SECONDARY MASTER
4 - Indicates a drive connected as SECONDARY SLAVE

Other than the number above, what you have typed should look identical to the above. When you are ready, press ENTER or RETURN on your keyboard. The MTKFLASH tool will begin to read the flash ROM inside your Lite-On optical drive and it will save a copy of the contents to your disk, in a file called backup.bin.

It may take a LONG time for this process to complete. On both of my drives, MTKFLASH took nearly five minutes to write a firmware backup. Just be patient and wait until the DOS prompt finally appears.

If you're feeling really cautious, reboot your computer into its normal operating system and copy the backup.bin file to your hard drive. Otherwise, or after you've done that, proceed.

Take a deep breath. It's time to flash the new firmware, which you'll do with a command like this:

MTKFLASH 3 W /B 5S5A.BIN

Keep in mind the drive "position" numbering that is outlined above and change the number (3) as needed to fit your configuration.

(Those who have been paying attention will note at this point that they are flashing a 256KB firmware image in place of a 512KB one. I don't know what the difference is, as I haven't investigated each firmware file in depth. Perhaps one is compressed, or later drives only had a 256KB ROM. Maybe it's both...one interesting difference is that the later Lite-On firmware has an HP copyright in it with a note stating that a license is available. What little I found on this seems to suggest it has something to do with UDF/packet writing. Maybe the Dell firmware didn't support that?)

Press ENTER or RETURN and let the MTKFLASH tool do its thing. Don't interrupt it.

(Those of you who ran the MTKFLASH program without command line options to see what it would do should be swatted for not following directions. So swat yourself if you did that, and DO NOT concern yourself with the "erase" command line option. You don't need to erase the flash ROM, and you may be sorry if you do.)

If you see any "error" notices on the screen while the flash image is being written, don't flip out and don't worry. Just let the process complete, and when it does, wait a few moments. Then just shut your computer off. Don't reboot it--you actually need to remove power from the optical drive so that it will be forced to start up with its new firmware.

When your computer boots into its operating system, try reading a CD. If the drive functions, you're probably in the clear. Try burning a CD-R and a CD-RW disc if you really want to be sure. Congratulate yourself on a job well done.

What If It Didn't Work?

Did you follow all the directions? I don't say that to be smart...if you skipped a step or didn't prepare something quite correctly, you can run into problems. Go over everything carefully and just try again.

Should all else fail, you can reflash your backup firmware file (which you did make, right?) or you can download the backup file that I made. (Swat yourself for not having made a backup, just so you really understand why you will make a backup of your current firmware for any future firmware fiddling.)

Send me e-mail if you have questions.


Go Back>

Copyright © 2010 William R. Walsh. All rights reserved. Permission is granted to produce this original composition or include portions of in other works, as long as credit is given and a link back to this page. This material or portions of it may not be displayed alongside advertising of any sort type. No fee may be charged to access this information or any portion of it, outside of fees required to cover the costs of printing materials or connection time/data usage.

The Lite-On 5S5A binary firmware image and MTKFLASH came from somewhere within myce.com originally. I can't find the source now, but I felt that attribution was appropriate. These instructions are based on the general binary firmware flash procedure found here.

The firmware files and firmware flashing utilities are the copyrighted property of the companies and people who created them. They are provided merely as a courtesy to assist those with the optical drives discussed in this article to accomplish a crossflash-type firmware upgrade. No profit is made from the distribution of these files, they are offered only as a public service.


* Mac OS X is an "EHCI error". I have yet to find ANY USB 2.0 PCI controller (tried NEC, VIA, and Acer Labs) that works 100% properly on Mac OS X 10.4 or 10.5
.